FAQs
FAQs
 Log in
 MyCIM
MyCIM


Six steps to get set-up on Google Analytics 4 (GA4)

- 15 June 2023
It is now less than a month until Google Analytics’ Universal Analytics (UA) will stop collecting new data. On 1st July 2023 Google Analytics 4 (GA4) will become the default Google Analytics (GA) platform.
If your company has not migrated by this point, a new GA4 property will automatically be created for you by Google and your UA configurations will be copied to the new GA4 property. Not all UA configurations have an obvious GA4 counterpart, and the automated process might not make the same choices as you would.
Google strongly recommends that you manually migrate your UA settings to GA4. I would also recommend you follow Google’s detailed guidance on setting up GA4 but as a quick summary, here are six steps you can follow to get started:
Six steps to get set up on Google Analytics 4 (GA4)
1: Check Google Analytics
Make sure you have a GA linked to your business. You can easily check by opening GA, otherwise here is a useful guide from Data Driven on how to check if a site has GA.
If you already have a GA account (which is likely to be UA), you can start the process of setting up GA4.
2: Navigate to the GA4 Setup Assistant
Within the Admin section, navigate to the GA4 Setup Assistant:
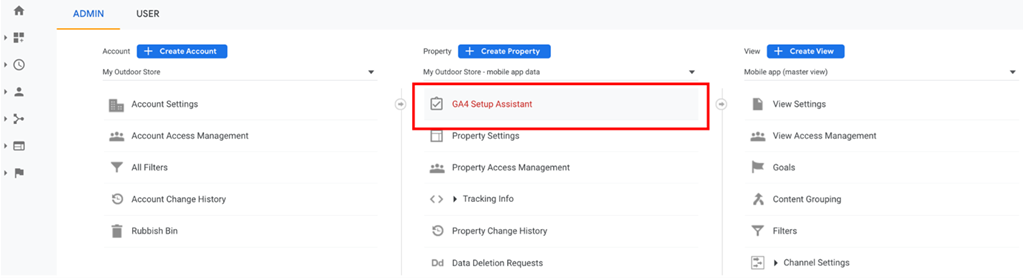
This will take you through each of the key steps to setting up GA4 for your website:
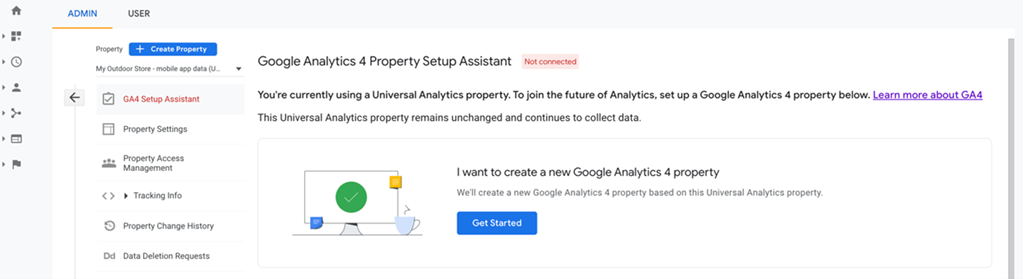
3: Create a GA4 property
The first step in the Setup Assistant will be to create a new GA4 property:

Select ‘Enable data collection using existing analytics.js and gtag.js tags’ and then ‘Create property’:
A property is a website or a mobile app (iOS or Android). You can have a separate property for your website, or set up GA4 to bring together the data from your website and app in one property using different data streams (see step 4 below). This is one of the main advantages of GA4 – the ability to see user data from multiple places in one place so you can see a holistic, joined-up user journey.
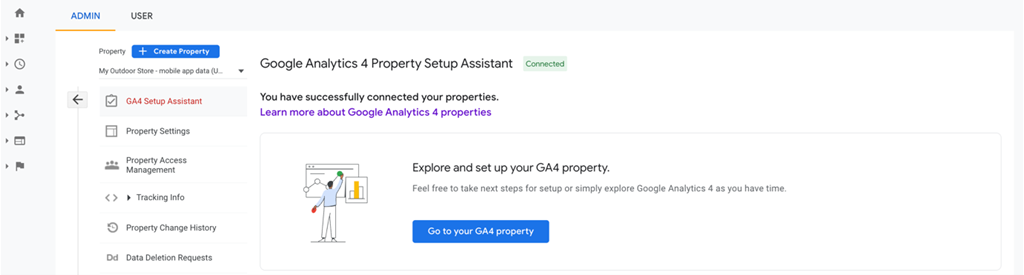
Click on ‘Go to your GA4 property’ and then navigate to the setup Assistant to continue the setup process for GA4:
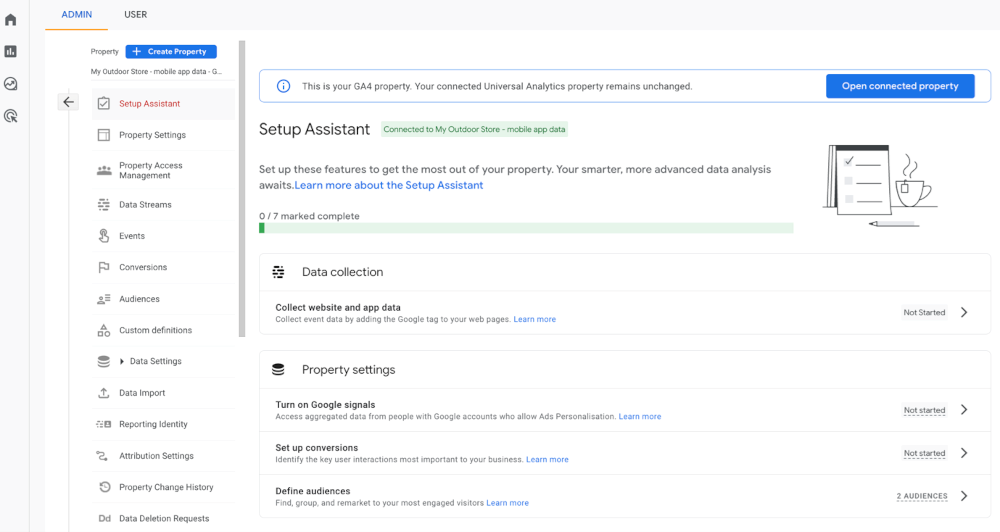
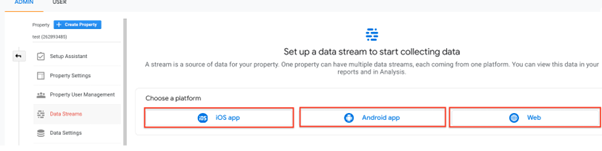
4: Add a data stream
Once you’ve created your property, set up a data stream by clicking on ‘Collect website and app data’ and selecting ‘Manage data streams’.
A data stream is a flow of data from a customer touchpoint (e.g., an app or website) to GA4. When you create a data stream, GA generates a snippet of code that you add to your app or site to collect that data. Data is collected from the time you add the code, and that data forms the basis of your reports.
A data stream will already be in place as part of the setup from your existing UA account. However, you can choose to add new data streams, e.g. if you have an app that you want to connect:
At this point you can also toggle enhanced measurements. This will enable GA4 to automatically track data of actions users typically do on a website, for example download a file, watch a YouTube video, search on the site etc.

5: Implement the GA4 tag to start tracking
For GA4 to collect data, you will need to add the GA4 tag to your site:
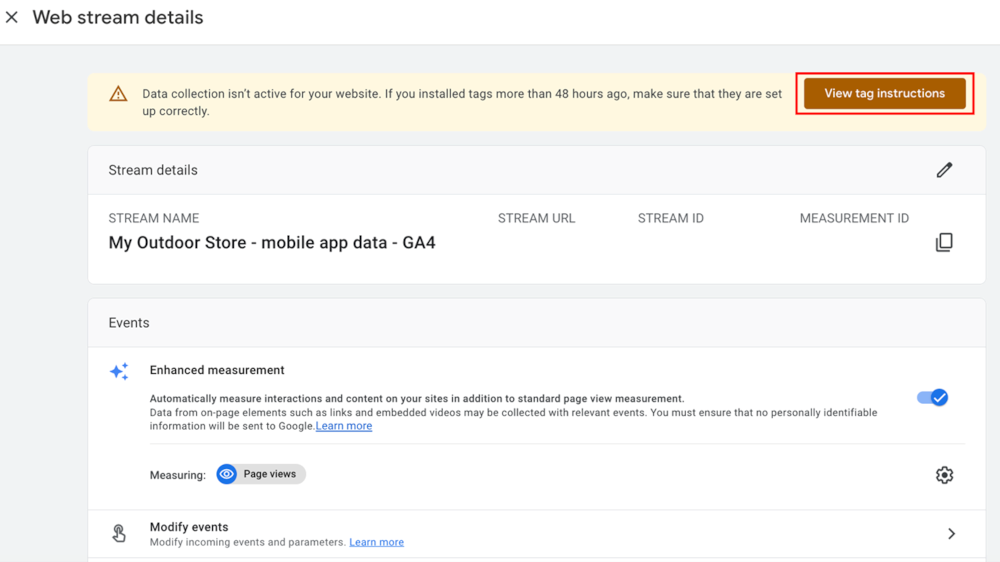
Select ‘View tag instructions’ and you will land on the instruction page in your GA4 account:
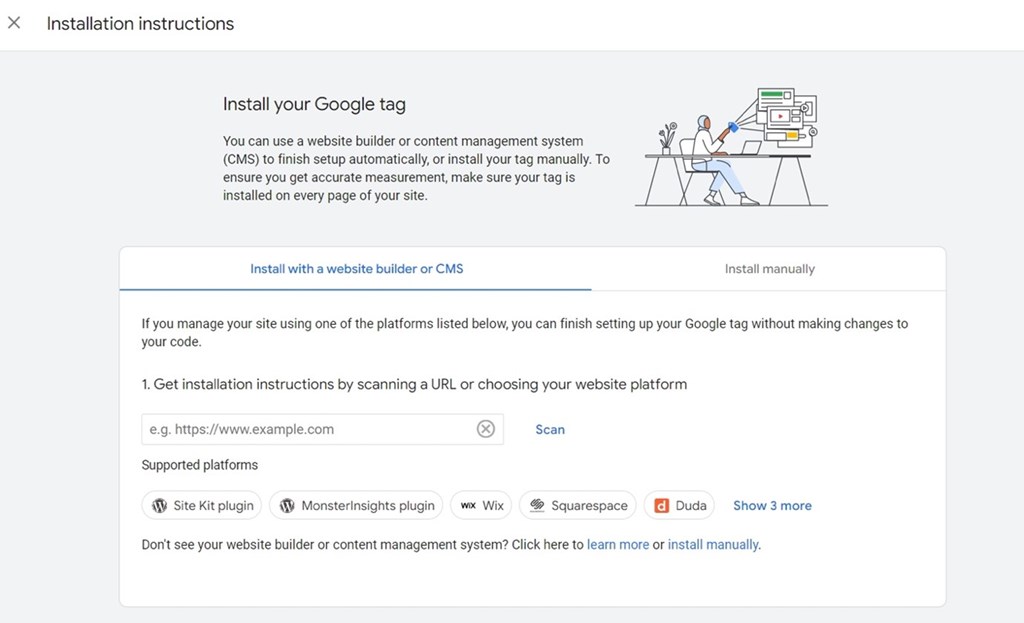
There are different ways to implement the tag:
- Use Google Tag Manager
- Work with your web developer or designer
- Use a plugin for your CMS, e.g. Site Kit for WordPress
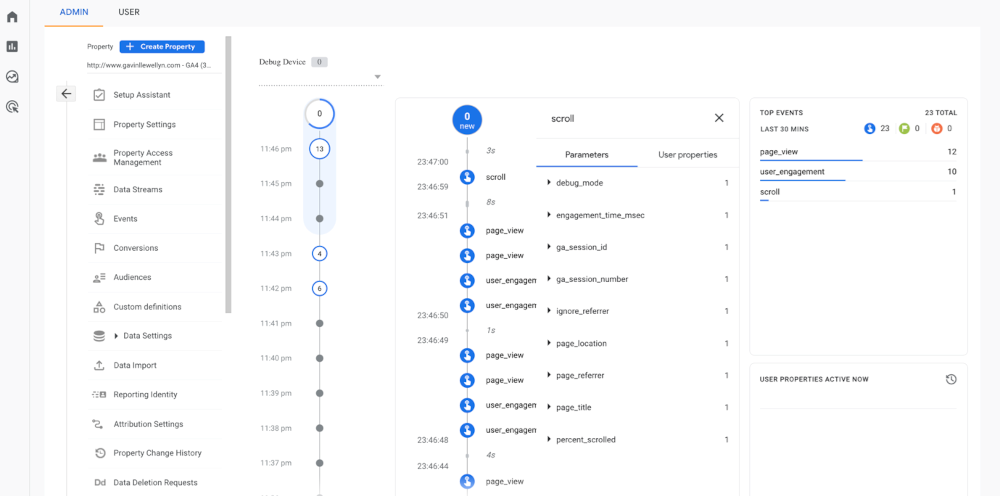
6: Check that GA4 is collecting data
After you have implemented GA4, it’s important to test that it is set up and working correctly. You can either wait 1-2 days or you can start using the DebugView immediately. Your DebugView is a real-time report that allows you to monitor events in real-time:
You can also visit the Real-time report to see if users are visiting your website:
- Open Reports > Real-time Report
- Visit your site in another browser window
- If you have no visitors in your report, there may be something wrong with your GA4 set-up
Once you've set up GA4
By following these six steps, you’ll have the peace of mind that you are set up on GA4 and can start collecting data through the new platform. From here you can start carrying out more actions by following the Setup Assistant steps, including turning on Google signals, setting up conversions and defining audiences.
Once this is in place, you can start thinking about how you and your team will approach your web analytics and insights strategy by booking onto CIM’s GA4 training courses.
- 0 views